Monday, March 16, 2015

Fairy Garden for my Daughter


My daughter is four and loves Fairies. Some of this love is just the love of little, tiny precious items to tuck away on special shelves and boxes. :)


We made a trip to Michael's Crafts yesterday and she saw these little fairy garden kits. Again, precious little items boxed for your convenience at a mere $30 each. hehehe  Single items - $2 to $5 each. If she were older, it might make sense to get a few, augment with found items and create a little potted fairy world for her. However, I tried it in the front for her last year and the little creation we worked on was far too small. She tore through it like a kaiju monster from Japan - ripping it all up and moving things around. This was fine - she's just playing, but I was going thought to larger items she could do this with in a garden she could actually explore.


So, I started making a game plan for something her and her sister could play in and around that had a Fairy feel. They have a little house they love to play in already - a big white plastic number we got from a dear friend. So, why not use that as a little base of operations for them, moving it towards the back of the "grass space" (...now mostly dirt and weeds to the the drought and tiny, stomping feet)  by our apple tree.

Now, spiders are all over the place here in Oakland during certain times of the year, so I have to make sure I don't send them off through webs and little red biting spiders for fun. I'd keep the space more towards the front of an area we're not making much use of currently - the space around our apple tree.

The tree is actually dead, but still producing fruit. It has a rather large hole area in the trunk. This will be perfect for little fairy goings on. I want to build a door into the base of the tree - custom and lovely with lots of flair and sparkly bits built into it. Shells, rocks and other items can be used around the area along with all the pine cones we have around behind the shed. They'll be able to move items around and play, but it won't be so tiny and breakable. URBAN ORE  will be looked through for some key, cool items.


I like the look and feel of this space. Great for a two and four year old girl to explore!
 I'd love to work on some fairy homes with the girls as well. I found a fun article on some DIY Fairy Homes I want to try out. Again, what a great way to play in the garden space and work on projects with the kids! 

http://inhabitat.com/diy-how-to-make-garden-faerie-houses-pixie-towers-and-toad-homes-from-reclaimed-materials/forest-fairy-house-lead/

http://inhabitat.com/diy-how-to-make-garden-faerie-houses-pixie-towers-and-toad-homes-from-reclaimed-materials/forest-fairy-house-lead/

Getting away from buying little pre-made items thrills me as well. I do the same when I can when I'm working on my train layout. I used to get boxed buildings that you simply unbox and drop on your layout. Not thrilling for me. I moved on to building out the building interiors and that was a lot of fun. Now, most of my buildings are built from paper or plastic kits and I'm planning to build a few custom buildings from scratch soon as well. Making use of found objects and things you dig up at places like Urban Ore is fun as well. The space you create is yours and unique. If you have the desire and energy to do custom work, why not!?

We'll see how this plan goes.

I think when they are older, I want to get into building some of these broken pot spaces. I love the look and I think the girls would love taking care of little spaces like this when they get to be a bit more mature about things like this. :)


Can't wait to get started, but the main gardening work comes first! :)


Garden ReStart

Kale flowering

Well, spring is in the air here at the Oaktown Oasis and the garden is calling me. :)

We've done some heavy planning and have been thinking through what worked well last year and what...didn't. heh  The blog has helped there - keeping track of what's what and what we liked about the garden last round.

We want to be able to actually use the items we're growing, to manage the gardens in the front and back, to present something nice in the front garden area and to have something the kids can use and explore. I think our plan is sound so far.


The main thing we want as far as big changes go is to get more dirt into the mix. Deeper beds for the plants to grow in. I think this is what really nailed us last year. We just didn't have the dirt to support proper growth. At least that's what we're assuming based on some tests we did with beans.

We planted beans in both a deep pot and our beds to see what would grow bigger and better. Our veggies were all dwarfs and we didn't know why. Well, the beans in the pot and the beans in the ground both sprouted at the same time, but the ones in the ground stopped growing at speed after about an inch while the potted beans shot up at an alarming rate! They topped out at around 7 feet while the ground beans never got past 5 or 6 inches. Amazing to see.


So, the plan is to combine the two larger beds into one, removing the bricks and rebuilding them into one bed with wood sides. The depth will be somewhere around 13 or 17 inches or so. Not 100% sure yet. We're going to have dirt brought in - a growth mix packed with goodness. We're also going to enlist the building assistance of a friend of ours who went this route last year. We're hoping that this gives us the space to really get some good stuff going. Carrots, onions, kale, chard and some other items we're going to be able to put to use for sure. We'll reuse some of the brinks in the center to create a walkway snaking path through the center of the bed for access.

I also want to get more strawberries going, so I'm going with the strawberry gutter idea I saw, planting the berries in gutters mounted on the side of the deck. This will allow us to block them off from squirrels and have them hang down so they don't go to mush on the ground.


There's a great "How Too" here:
http://www.onehundreddollarsamonth.com/how-to-grow-food-in-a-greenhouse-planting-strawberries-in-gutters/    Seems rather simple. I think we'll try to find used gutters, but we'll see - I want them free from hazards like bad paint.

Two rows of strawberries on the sunny side of the patio area.
We had a fantastic area with big, bushy flowering plants on the side of the lawn, but the broken sprinkler we had stopped us from using the timed sprinklers. (Well, that and the drought!) So, they died out a bit and never really came back to full. They used to block the fence and be filled with lovely, red flowers. Now, they are host to angry wild roses and a few flowers here and there. So, I'm going to take one group out for more planting area. Maybe even a Fairy Garden for my daughter to work with a small seat and some accent pieces. I mentioned it yesterday and she was so excited by the idea that she almost jumped out of her seat. :)


The area by our shed will be upgraded as well with another higher set box and some shed side stabilization. This will be our Black Krim area - tripping the plant that we had last year.


I'd like to build a planted area like the one I saw as well. I'd keep this side high to allow for the tomatoes to grow, then I might do another on the right side of the shed door with more boxes. We'll see - this might be a PHASE TWO for next year, though...if I'm already building things....why not?


The front yard is a wild place right now. However, I think we can get it looking managed and tamed with a little work. Our neighbors pay folks to come in and manage their yards, but we don't want to spend that kind of cash on that. I'm fine putting the time and effort in. What better way to enjoy ones home!? :)  (And...if we're paying anyone to do things like this, we'd rather pay someone to come and clean the INSIDE of our place! heheheh)  So, what I want to do is a little plant management.

• We're going to plant Salvia in the front - nice purple plants that can fill in some of our dead spaces.
• I'm going to finish running out drip tubes to make watering easier and more efficient.
• The plants that are there currently will be manicured and trimmed - keeping them less wild looking.
• The "grass" in the very front will eventually be torn out with the stones that are there at the moment. I'll lay down more dirt, replace the stones, then place a low water ground cover there to cut back on weeds and maintenance.
• The only other addition will be an herb garden in the front. This will have oregano, thyme, rosemary and maybe some mint. This was a request from Shana and it makes a lot of sense. We had herbs out in the back, but the kitchen is in the front. Walking all the way back, out to the patio and down to the herbs is not as efficient as just walking to the front door and down two steps. The herbs were not used much from the back, but they'll be great in the front. We're also sharing some with a neighbor that lets us snag lemons from her tree, so it will be great for them as well.

I want to make sure we're mixing up the plants in the back and using this COMPANION PLANTING chart I found. I'd also like to break away from the traditional row planting a bit. We have relatives down south who have done it and it's a really nice look - various veggies and flowers growing in lovely patches.  We'll try it out.


Go team NEGIN / JOHNSON!  :)     @}---->------------

Wednesday, October 1, 2014

Short veggies and apples

Just a quick post.

We wrapped APPLE SEASON up nicely. Shana made some apple sauce with Talia which I even liked. (Not usually a fan) It's grand actually being able to use the apples this year. Last year, they were hit with some buggies or some such, but this year we treated the tree with an oil, hung buggy catchers and seemed to be able to fight off most of the bugs leaving us a lovely crop. Next year, will hit things a little harder and save more apples.

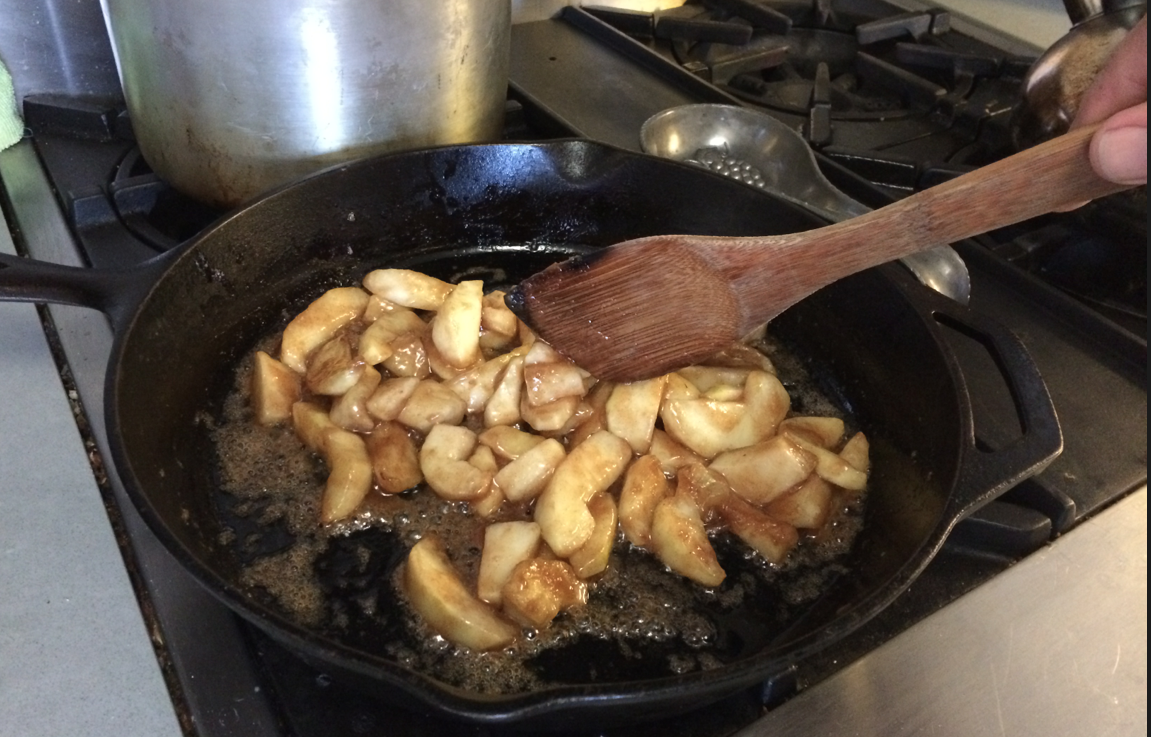
I made some fried apples that were....so damn good. :)  A lovely breakfast for the family. I followed this recipe and it was a sweet treat for all.

http://divascancook.com/best-southern-fried-apples-recipe/

We're looking into building a new planter box next year as well. We think our soil isn't deep enough to get large, full grown veggies.So, next year, we're going to build a deep wood box, bring in better soil and try for larger veggies.

I've dropped in images below.

Cheers!


Best Southern Fried Apples
 

Author:
Ingredients
  • 2 large granny smith apples
  • 4 tablespoons real butter, chopped
  • Juice of ½ lemon
  • 2 tablespoons white sugar
  • 2 tablespoons brown sugar
  • 1 teaspoon cinnamon
Learn More From a BBQ Expert.
 
Instructions
  1. Peel, core and cut apples into even slices.
  2. Melt butter in skillet over medium heat.
  3. Add apples and drizzle them with lemon juice.
  4. Let apples simmer until most of butter is absorbed and apples are tender. (do not overcook. Apples should be firm to the touch, yet tender with a little give to the bite.)
  5. Stir together sugars and sprinkle them over apples.
  6. Toss to combine.
  7. Lower heat if needed.
  8. Let apples cook until sugars are completely dissolved and syrupy.
  9. Remove from heat and sprinkle apples with cinnamon.
  10. Toss to distribute cinnamon.
  11. Plate apples and serve piping hot!
Notes
Cooking time will vary based on apples used and thickness of apples.
Granny smith makes the best apples for fried apples.

Saturday, August 16, 2014

Fun in the sun

Seneca filling her potty with water. Classic. :) Our green beans are growing like weeds. Definitely our most successful efforts.

Friday, July 25, 2014

July in the garden


The garden is moving along, but not as lush and large as i thought it might be. I think this was mainly due to the way we planted things this year. We were doing rows, keeping distance and not paying 100% attention to the watering and care due to life items (kids and the like), so there were times things got dry or needed a bit more attention.

However, we do have some winners in the bunch, this round going to the Black Krim Tomatoes. They really came out in full force and seemed to thrive in the area we planted them in.


Talia and Seneca love planting and tending to the garden. I think next year will see Talia putting even more energy into planting, watering and tending to things. We'll see. :)


Gathering onions and chives


Onion taste! :)


Early Krims were a beautiful green color

Chives

Onions


Black Krim


Our other tomatoes.....well....they didn't thrive. :)

Meh

Shana's delicious tomato soup with some of ours in with some other items from the garden


We planted green beans and they shot up in about 30 hours! Crazy!

Green beans

 Corn shot up as well. They both seem to love the sun they are getting.


And, the other benefit of being out in the garden - the done we purchased from Talia's old school when they moved locations. The kids love it. Talia is getting really strong climbing the thing! :)


It was really nice taking some time to just hang out in back today. I was just talking about the fact that we have not had many "summer days" to just sort of hang out. Shana pointed out that we did actually have the days, but we were not chilling in back during them. We were GO GO GOing, as usual. So, making more time to enjoy the yard and garden in on my list! 


We're feeling the effect of the California water crisis as well. We've just let our lawn go, which isn't saying a whole lot - it was really in bad shape already. I'm looking into more planter boxes or raised beds to take over some of our lawn space. While it's nice to have a place for the kids to play, it would be nice to have a little more garden space as well. We'll see. I still have strawberry gutter planting in mind, so the extra space would be fun.

Our plums have come and gone already and we really didn't do much with them this year. We didn't even get jam or jelly made this round, but some were eaten by friends and family at least.

We didn't get apricots this year which was sad. I think the tree produced around six in total - two of which ended up on the ground, sadly. Maybe we'll have more next year.

Our fig tree produced a ton this year as did the olive tree. We need to see how to process them both and when to pick 'em. 

CHEERS!